If your students do not already have accounts in the system, there are several easy ways that you can add them. You can either add students one at a time by creating individual accounts, or you can add a large number of students at once using a special import document. Both of these methods are described below.
There are two ways to create new student accounts. Click on one of the two methods below to learn more about that part of the account creation process.
1. Adding individual student accounts
2. Importing large groups of students
1. Adding individual student accounts
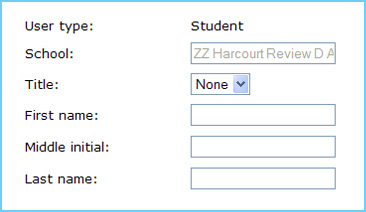
- As a teacher, you will only be able to create student accounts, so 'Student' has already been filled in for the User Type. School and district administrators can create other types of accounts.
- As a teacher, you will only be able to create accounts for students that exist within your own school, so the school that your account is aligned to has already been filled in for the School field. District administrators can create other accounts in any school in their district.
- Enter the saluatation for the account holder (if applicable) using the Title drop-down.
- Enter the student's first name in the First Name field.
- Enter the student's middle initial in the Middle Initial field. (This field is optional.)
Note: This field will only hold one character or letter.
- Enter the student's last name in the Last Name field.
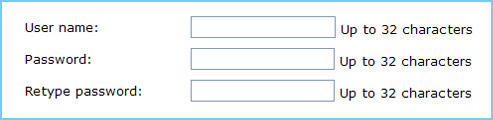
- Enter a unique user name for the student account in the User Name field.
- Enter the password for the student account in the Password field.
- Type the same password again for confirmation in the Retype Password field.
- This is the name and password that the student will use to log in to the system, so make sure you make note of the information.
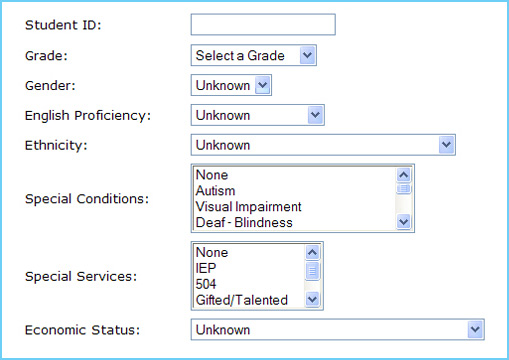
- If your school has individual student ID numbers, you can enter that information in the Student ID field. (This field is optional.)
- Select the student's grade using the Grade drop-down field.
- The following six fields are related to the No Child Left Behind (NCLB) demographic categories. These categories are all optional, but they may be needed for some filters or operations in the system, such as running a performance report against these NCLB categories.
For example, if a student is not marked
as a male or female here, they will not show up on reports run against male or female filters elsewhere.
- Select the student's gender using the Gender drop-down field.
- Select the student's proficiency with English using the English Proficiency drop-down field.
Note:
The choices for the English Proficiency field are English Proficient, Beginner, Early Intermediate, Intermediate, Early Advanced, and Advanced.
- Select the student's ethnicity using the Ethnicity drop-down field.
Note: The choices for the Ethnicity field are American Indian/Alaskan Native, Asian, Black or African American, Hispanic or Latino, Native Hawaiian or other Pacific islander, White, and Other.
- Select any special conditions that the student might have using the Special Conditions field.
Note: The choices for the Special Conditions field are None, Autism, Visual Impairment, Deaf - Blindness, Developmental Delay, Hearing Impairment, Orthopedic Impairment, Multiple Disabilities, Mental Retardation, Emotional Disturbance, Speech and Language Disorders, Specific Learning Disabilities, Other Health Care Needs, and Traumatic Brain Injury. You may select more than one option by holding down the Control (Ctrl) key on your keyboard and clicking on multiple options.
- Select any special educational services that the student may be receiving using the Special Services field.
Note: The choices for the Spcial Services field are None, IEP, 504, Gifted/Talented, Migrant Education, and Title I. You may select more than one option by holding down the Control (Ctrl) key on your keyboard and clicking on multiple options.
- Select the student's economic status using the Economic Status drop-down field.
Note: The choices for the Economic Status field are Not Economically Disadvantaged, Eligable for Free Lunch Program, Eligable for Reduced-price Lunch Program, and Economically Disadvantaged by Other Criteria.
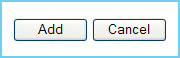
- To save the student's date and create the new account, click the Add button.
- To exit the screen without saving any of your changes, Click the Cancel button.
2. Importing large groups of students
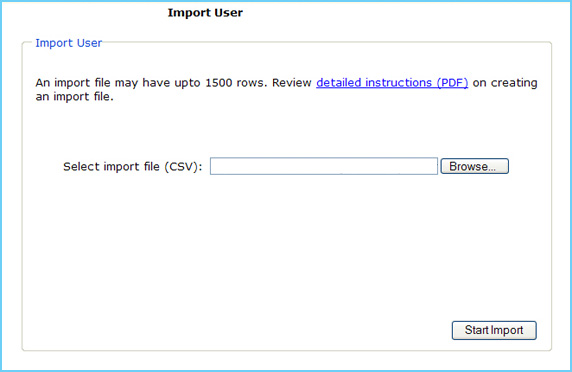
- Users have the ability to add or edit multiple student accounts at a single time. Users will import student accounts from an existing file.
- To view more detailed instructions on how to create a student import file, click the Detailed Instructions (PDF) link above the file input field.
Note:
This doument, in PDF format, will provide in-depth instructions on how to create and correctly format a file that will allow you to import large numbers of students at one time.
- To locate the import file that you have created, click the Browse button.
Note: The Browse button will bring up a standard file browsing window. Navigate to the location of the file on your hard drive or network, click on the file, and click the Open button to select the file.
- After you have located the file you would like to import, click the Start Import button to begin the procedure.
- You will receive a message letting you know once the upload is finished and if the import of users was successful.
Back to Top |